

Thought you might be interested to see how I complete a sheet of felt, although there are numerous very good sites on the net, simply type 'how to make felt' into Google and see what comes up. My method is probably not very strictly traditional, and I'm sure a lot of felters would curl up and call me names for my technique, but it works (as you will see), so here goes:

The 'manly' coloured merino wool fibres and feltable knitting yarn I'll be using for the slippers.
1. I make my felt at the kitchen sink, as I can lay the wool fibre out on the draining board, and if I make a mess I can clean it up quickly. The laundry is also a good room. Firstly I lay a sheet of bubblewrap on the draining board, then begin to pull off little pieces of the wool and lay it in on the bubblewrap - imagine you are tiling a roof - one direction for the first layer, the other direction for the second layer and so on. See my cleverly designed photo below. I used four layers of wool, swapping direction with each layer.

2. The next REALLY IMPORTANT bit is to get all the air out from between the fibres. How I do this is to gently pour very, very hot water onto the fibre in pretty patterns, then I lay another sheet of bubblewrap over the top and gently press and squash the air out. You'll find the water squishes out from the edges when you do this, and spreads through the wool. This is good! You may need to keep adding water. Keep pressing until all the air has been squashed out.
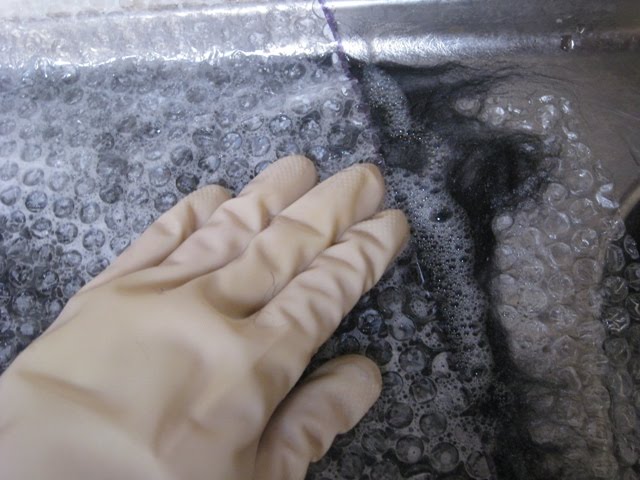
3. Lift the bubblewrap and squirt a few blobs of soft soap onto the wool. Don't use anything with harsh detergents. Not good for the wool or your hands. Add some more water. Lay the bubblewrap on top again and then making circular movements with your hands, rub over the whole sheet. Now it gets lovely and bubbly. Keep rubbing. This is the stage where you need to be fairly careful as the wool hasn't bonded together properly yet. Keep checking under the bubblewrap to see if the wool is pulling up, do this by trying to pull up a few fibres between your finger and thumb - see pics.

Wool fibres pulling up too much - fibres still too soft.

4. When the wool isn't pulling up very much, you can now get rougher with the fabric! This is when I roll up the felt in the bubblewrap and roll it backwards and forwards on the draining board. You can also squeeze the roll of felt and bubblewrap. The more friction the better. Another good thing to do is to keep it wrapped in the bubblewrap and roll it backwards and forwards in a sink of hot water (best wear rubber gloves).
5. The felt should be feeling much more rigid at this stage, then you can alternately rinse it in hot then cold water to help the 'fulling' process, and basically do all the things you were told not to do with that beautiful 100% wool sweater by your mum. At this point I was wringing the felt out then flattening it on the draining board each time to see how it looked and 'felt'. Hmmmm .... anyway, when I thought I'd fulled the felt enough I rinsed it out finally to get rid of all the soap suds and lay it outside in the shade to dry. Voila - one sheet of felt! And it's so much nicer than the acrylic felt you can buy.

The finished product - look how much it's shrunk in the fulling process.
Feltmaking is so much fun because it's so hands on. I used merino wool fibres that you can buy in any craft shop - for this project I used an 80g bag of merino, which costs around $10 at Spotlight. You need to make time for about 1-2 hours of rubbing and wringing, but it's worth it, I promise. Next thing I have to do is make a pair of slippers out of the felt for my husband. That could be fun!
And if all that was as clear as mud and you would like further help or have any questions, please feel free to contact me at my e-mail address which is in my profile info.
No comments:
Post a Comment